Welcome!

I hope this blog will help people give and get ideas about quilting or any other stitching you're doing. I've been inspired by so many things on the web, I hope this becomes one of those things for someone.


Monday, November 21, 2011

Cousin Kelly's Second Baby Girl!

Kelly's adding another one to her adorable family! Little Brigid has already been welcomed into the world, unfortunately her loving cousin is a bit behind in her quilting. I've just gotten the appliqueing done, and am planning on getting the batting to do the quilting tomorrow.  Again, this one was a learning experience, and I'm going to be attempting a minky backing again. Well here's the preliminary shots!

Here's the whole top. It's all batiks, and I love that it's a mix of all different hues of pink.


I did her name the same way that I did with my previous baby quilt. I absolutely love the font, I found it at dafont, they have a ton of fun fonts that can help make your quilt so much more personalized.

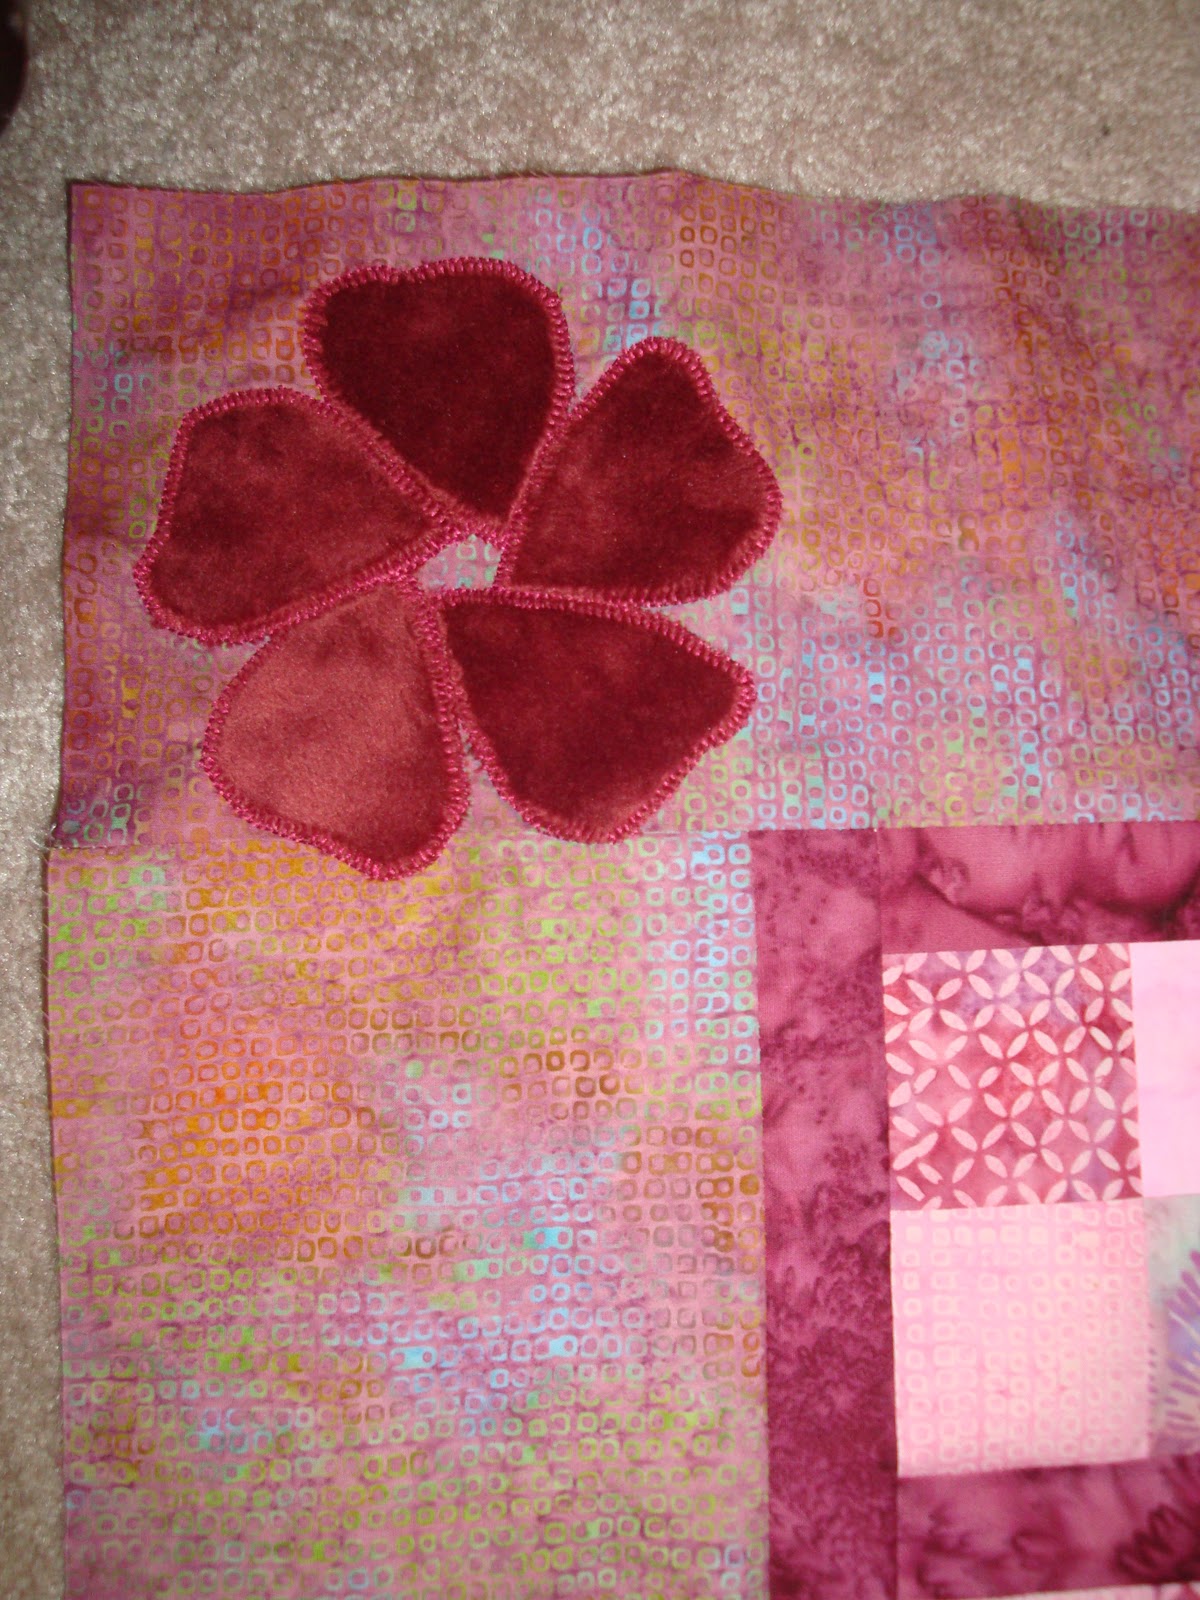
One of two flowers in the corners of the borders. I made them out of minky....this proved to be a little tricky. You're not supposed to iron minky, so using Steam-A-Seam was out. I hand cut the individual petals out, and traced the design onto the border with the washable Dritz marker. I used very small dots of Liquid Stitch to hold the petals in place.  I waited about 10 minutes before stitching. Again, I used a blanket stitch, and I had to be very careful because the hairs on the minky move making it hard to judge where the true edge of the fabric really is. I did find that if the minky got a little unruly, it was easily corrected by some close trimming with embroidery scissors.

I'm not sure how I'm going to quilt it yet, I'll most likely try mimicking the flowers in the borders in some of the blocks, but I was thinking of throwing in some hummingbirds and dragonflies like there are in the fabric. Hopefully I'll be getting the batting tomorrow and having a quilting party on the longarm over Thanksgiving!!

Elizabeth Has Arrived!!

Little miss Elizabeth has graced us with her presence! She is the cutest little bundle, and you all know what that means! I finally got to finish her quilt and give it to her wonderful mother, my cousin.  As planned I cut out the letters for her name and blanket stitched them on. I used Lite Steam-A-Seam 2 to stabalize the letters on the quilt top. So, drum roll please, here are the pictures!

This is the quilted and bound, finished product.


I learned something very important while appliqueing: Be careful when putting a light fabric on top of a darker patterened fabric, it has a tendency to show through.

Some of the quilting that I did in the blocks, I did get to put the little birdies in, just like I planned, chirp chirp!


The quilting in the borders, I absolutely love the little rosebud, can you see it?


I changed the game plan a little bit and went with a minky backing. It's the first time I ever used one, and I put in on the longarm. I found that it was very stretchy, so using my side clamps had to be done with a lighter touch. I also noticed when I was done that the minky covers up most of the quilting, I was a little disappointed with that, but it's really good if you've got a couple of stitches that you're not so fond of.

Overall I loved making this quilt. The new mommy, daddy and grandma really seemed to like it too. When her daddy came home from work one of the first things he did was put the minky up to his face! Incorporating the bedding that she used in her room turned out to be a big hit too.  The quilt matched perfectly with her entire room. I'm so happy I was able to make this for her.

Wednesday, September 14, 2011

Longarm Sampler

So I heard about using Crayola Washable Markers to mark up a quilt, from Turbo Quilter. I love her stitching and I say where she wrote that she uses thes markers to draw on the quilt and then washes it out.  I'm still very new at using my longarm and quilting in general, so I thought this method might be for me.  I went to Joann Fabric and got a bunch of muslin and some cheap batting. I drew all over the quilt with every different color marker in the box as well as the washable marker from the quilting notions section.  While I was drawing on the quilt I did make some mistakes, so I did as Turbo Quilter suggested and sprayed the offending spot with water. Unfortunately this did not work well on the Crayola markers but was suprisingly effective on the quilting marker.  I tried my best to follow the lines, granted I didn't always, but I was very pleased with the results. Even though the Crayola markers didn't come out with a spritz, every color came completely out with washing.  The quilting and drawing process took me 3 days total before I got the quilt into the washer.  I don't know if it would be harder to get the markers out after a longer period of time.  I just need to get a little better on my tracing capabilites before I put this on one that I'm going to give away! Here's the picture, I wasn't with it enough to take a picture with the quilt all marked up before the stitching, but here's before washing and after washing.
This is the front before going in the washer, you can see the part on the quilt where I tried to spritz out the red marker, all it did was bleed.

Here it is fresh out of the washer, absolutely no marks at all!! Lovely!

Holiday Block Swap

One of the groups I belong to on facebook is holding a holiday block swap for it's members, and I decided to participate.......we'll see how this goes.

I decided to use my pretty pretty EQ7 to make some unique blocks for the lucky ladies in my group and the results were varied. The blocks that I chose that were completely pieced turned out great, the blocks that I decided to paper piece......well it was challenging to say the least. I had to completely re-do one of the blocks because I messed it up so bad.  Apparently I have no concept as to how to cut the pieces before you use them.  Now I'm not a novice at paper piecing, I've been in the process of completing a pattern from Starr Fabrics for a while now.  So I thought I could handle it....apparently not. I wasted the most beautiful sparkly black fabric, but alas I went to fabric store got a different black and tried again. Needless to say I am now an expert at measuring the approximate cutting sizes for paper piecing! Tell me what you think of my blocks:

Christmas


Easter


Halloween, one of my favorites! Didn't want to send this one away.


Hanukkah


Independence Day


Mardi Gras


New Year's Eve, another favorite.


Canadian Remembrance Day


Thanksgiving

The only criteria to create the blocks were to use the colors that the requestor specified.  I think I did a pretty good job, but I won't find out until the middle of October! Yikes! Fingers crossed.....

Friday, August 26, 2011

Cousin Karen's New Baby!

I finally got to show my cousin the baby quilt that I made for her.  So far it's just the quilt top, she's not due until the end of October. But here's a preview:
Her colors are pink and brown, could 'ya guess? I made sure to incorporate the bedding that she registered for from Pottery Barn Kids.  She chose the Penelope collection and I tore up some pillowcases to make the white inner border.
I love the little birdies, and I'm hoping to use them in the quilting design.  The roses are appliqued on, I cut them out, as is, from some yardage and blanket stitched them on.  I plan to do this with her name too, once she's born that is! More pictures will come once the little lady graces us with her presence and I can finish the quilt!

Tuesday, August 23, 2011

OBX Lighthouse Cross Stitch

One of my big purchases from my vacation last week.  My family and I have been travelling to the Outer Banks since around 1996.  I absolutely love the area and would live there if I could.  I've got a bunch of plans for quilts for when I hopefully get a beach house there.  These jumped out at me when we were at the Wright Brother's Memorial.  I'm thinking of incorporating them into a quilt. 
Here's how the first one came out. It was very easy to do, only took a day and a half, and that was with work in the middle. I think I'm going to have to do a more traditional type quilt if I want to fit these in.  Which is good because all of the other ideas for OBX quilts that I have are very bright and fun.  So maybe this can be a wonderful, traditional, kinda serious quilt. Ideas are still brewing.....

Hi Hello!

Hello out there! Well this is the beginning. I'm hoping that this blog will help me organize my thoughts, and my projects (gulp).  As of right now I've got 4 quilt tops that need to go on the longarm, 4 (I think) quilts that I'm currently pieceing, 2 bags waiting to be done, and 3 or so cross stitches that need to be done (sigh). I have no idea how I'm going to keep my brain straight and get them all finished. This, of course, excludes the dozens of other projects that haven't even been started yet. Well, at least my projects and scraps are all organized! I would say I am fabric obsessed, and have decided that it's best to share my disease (snicker snicker). So, I hope you're all ready for my wacky ways, and I really hope you enjoy!